Your cart is currently empty!
Local

LOCAL
Local
LOCAL
LOCAL
We do the “usual” farm things like canning, freezing and drying produce in one form or another but in today’s environment it’s almost impossible to be totally self-reliant. Going to the local grocery is almost unavoidable so when you have a chance to purchase your food from a fellow farmer it can be very rewarding.
Recently I was introduced to a farmer in Parkman that grows some 600 acres of organic grains and produce. An amount almost unimaginable by me.
The beauty is that I was able to use his whole grain flour to produce the bread we eat. Replacing flour from various far away sources with unknown handling practices with locally grown, organic flour produced by hardworking farmers who take personal pride in their craft.
So, I thought what other benefits are there to buying local?
- Freshness: Locally grown produce often travels shorter distances to reach your plate, meaning it’s usually fresher and more flavorful.
- Nutritional Value: Fresh produce tends to retain more nutrients. Plus, local farmers may prioritize sustainable practices over maximizing shelf life.
- Supporting Local Economies: When you buy from local farmers and producers, you help boost the local economy and support small businesses in your community.
- Environmental Impact: Local food often has a smaller carbon footprint since it doesn’t need to be transported long distances. This can reduce greenhouse gas emissions and lower overall energy consumption.
- Seasonal Eating: Eating locally encourages you to consume foods that are in season, which can lead to a more varied and balanced diet.
- Connection to Food Sources: Knowing where your food comes from helps you build a deeper connection to what you eat and fosters a greater appreciation for farming practices.
- Community Building: Farmers’ markets and local food events create opportunities for community engagement and help build stronger social ties.
So, next time you’re at the market, you might find that buying local is not just a tasty choice, but a feel-good one, too! 🌱🍅
The flour I speak of can be purchased from the Rusted Rooster Farm
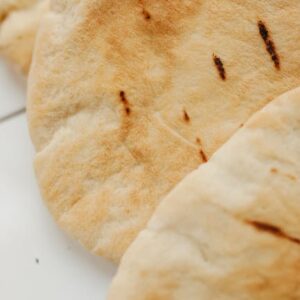
Pita Bread
Homemade Pita Bread
Equipment
- 1 Large Bowl
- 1 Pizza Stone
Ingredients
- 1 Cup Warm Water
- 2 tsp Active Dry Yeast
- 1 tsp Granulated Sugar
- 3 1/2 cups All Purpose Flour we used local Turkey Red Flour
- 1 tbsp Extra Virgin Olive Oil
- 1 1/2 tsp Kosher Salt
Instructions
- In a large bowl, combine warm water, yeast and sugar and stir until dissolved. Stir in1/2 cup of flour and let sit for 15 minutes, until mixture foams.
- Add oil, salt and 2 1/2 cups flour, (reserving 1/2 cup) and stir with a wooden spoon until shaggy mass forms. Dust a clean surface with some of the reserved flour and knead until smooth and elastic, about 7 minutes. Adding more of the reserved flour if the dough is too sticky. Dough should be soft and moist.
- Place dough in a clean large bowl and cover with plastic wrap. Leave in a warm place until dough has doubled in size, about 1 hour.
- Place pizza stone or large cas-iron skillet in your oven and preheat to 500f. Lightly dust a clean surface with flour. Punch down dough and turn it out onto surface. Divide dough into 8 pieces and roll into balls. Cover with a towel or plastic wrap and let rest for 10 minutes.
- Working one at a time, roll each round into a 1/4" thick circle about 6" wide, sprinkle dough with flour if starts to stick.
- Working quickly as possible, open your oven and place as many pitas that will fit on your skillet or stone without touching. Let bake until air pocket ballon and the pita begin to turn golden brown, 3 to 5 minutes. Repeat with remaining rounds.
- Cover baked pitas with a clean kitchen towel to keep warm.
Subscribe
Login
0 Comments
Oldest